Table of Contents
ToggleWalk into any commercial cinema and you’ll notice every seat has a clear sightline to the screen. That’s tiered seating at work, and it’s the single most transformative upgrade homeowners can make to a basement or bonus room theater. Instead of craning necks around heads or settling for compromised viewing angles, a tiered setup elevates rear rows so everyone gets an unobstructed view. This guide covers everything from planning and framing to the design choices that separate a decent home theater from one that rivals the multiplex down the street.
Key Takeaways
- Tiered home theater seating uses raised platforms called risers to elevate rear rows, ensuring every viewer gets an unobstructed sightline to the screen—the single biggest improvement you can make to a basement theater.
- Proper riser height typically ranges from 12 to 18 inches, with the goal of providing 6 to 8 inches of vertical clearance between a viewer’s eyes and the head in front, plus adequate headroom above the platform.
- Tiered seating improves acoustic performance by raising listeners’ ears above the direct floor plane, reducing early reflections and enabling better subwoofer integration across multiple rows.
- DIY tiered seating installation requires basic framing skills and materials like 2×6 joists, plywood sheathing, and construction screws, though permit requirements and electrical code compliance should be verified locally.
- Double-tier and curved riser configurations suit larger spaces and can create true stadium-style seating, while single-tier layouts are most practical for standard residential rooms with 12 to 16 feet of depth.
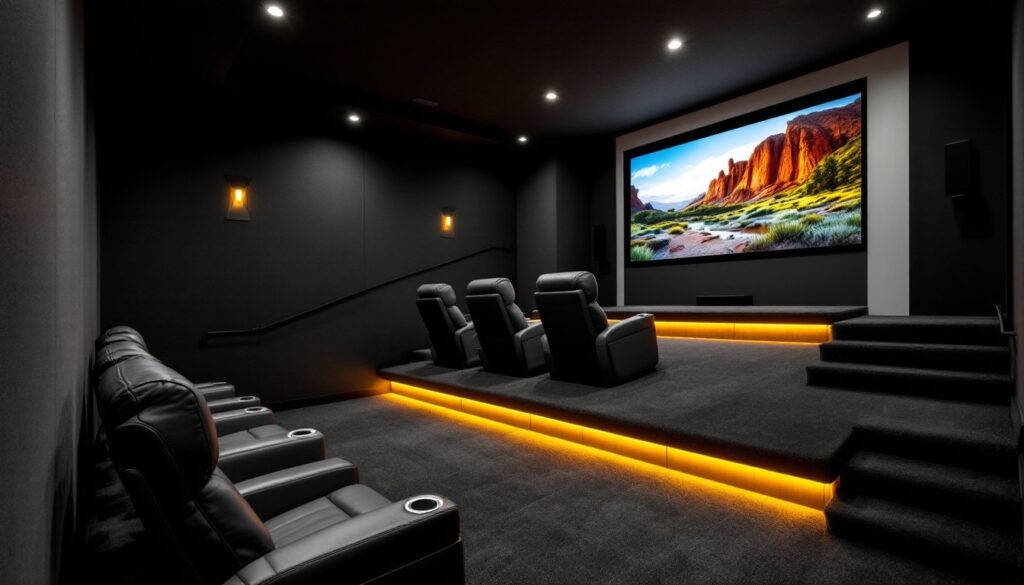
- Finishing tiered seating with carpet, LED step lighting, and wrapped riser fronts adds both comfort and aesthetic polish, transforming a functional platform into a design element that rivals commercial cinema quality.
What Is Tiered Home Theater Seating and Why It Matters
Tiered home theater seating uses raised platforms, called risers, to elevate each subsequent row of seats above the one in front. Most residential setups feature one or two risers, each typically 12 to 18 inches in height, depending on ceiling clearance and seating style.
The principle is simple: When the second row sits higher than the first, viewers’ eyes clear the heads in front. This eliminates the single biggest complaint in home theaters, obstructed views.
Unlike stadium seating in commercial venues, residential tiers are usually built as permanent or semi-permanent platforms framed with 2×4 or 2×6 lumber, sheathed with plywood, and finished to match the room’s flooring. Some builders install modular platforms, which can be disassembled if the space needs to revert to a flat floor.
Tiered seating also improves acoustic performance. Raising listeners’ ears above the direct plane of front speakers can reduce early reflections off the floor and allow for better subwoofer integration across multiple rows. It’s why commercial cinemas and high-end home theater designs prioritize elevation, it’s not just about sightlines.
Benefits of Installing Tiered Seating in Your Home Theater
Unobstructed viewing from every seat is the headline benefit. In a flat-floor theater, rear-row viewers sit at eye level with the backs of front-row heads. Even reclining seats don’t solve this, recline angles tilt viewers’ gaze upward, not over obstructions.
With a properly sized riser, every person gets a direct line of sight to the screen. The rule of thumb: the vertical distance from one viewer’s eyes to the next should exceed the height of the head in front, typically 6 to 8 inches of vertical clearance.
Tiered seating also increases capacity without crowding. By stacking rows vertically instead of spreading them horizontally, homeowners can fit more seats in a smaller footprint. A 14-foot-deep room can comfortably hold two tiered rows, whereas a flat layout might only accommodate one row with decent legroom.
Another often-overlooked advantage: easier cable management and equipment placement. Risers create hidden voids beneath the platform, ideal for routing speaker wire, HDMI cables, and power. Some installers build equipment racks or storage compartments directly into the riser framing.
Finally, tiered seating adds perceived value. Home buyers and appraisers recognize a purpose-built theater, and platforms signal that the space was designed, not improvised.
Planning Your Tiered Theater Layout: Key Considerations
Measuring Your Space and Determining Riser Height
Start by measuring the room’s length, width, and ceiling height. Ceiling clearance is critical: viewers on an 18-inch riser need at least 7 feet of headroom above the platform to avoid a cramped feel. If your basement ceiling is only 8 feet, a single 12-inch riser is more realistic.
Next, calculate row spacing. Each row needs 36 to 42 inches of depth to accommodate the seat plus legroom. Recliners require more, some power recliners extend 60 inches when fully open. Measure the actual footprint of your chosen seats before framing anything.
Riser height depends on seating style. For standard upright chairs, a 12-inch riser often suffices. For recliners or theater seats with a lower eye height when reclined, bump that to 15 or 18 inches. Mock up the layout with cardboard boxes or sawhorses to test sightlines before committing.
Finally, account for screen height and viewing angle. The center of the screen should sit at or slightly below eye level for the front row. If the riser elevates the back row too much, rear viewers end up looking down at the screen, just as uncomfortable as looking up.
Choosing Between DIY and Professional Installation
Building a tiered platform is within reach for most DIYers with framing experience. The structure is essentially a low-profile deck: a frame of 2×6 or 2×8 joists on 16-inch centers, topped with ¾-inch plywood or OSB sheathing, and finished with carpet, hardwood, or laminate.
You’ll need:
- Circular saw or miter saw
- Drill/driver and 3-inch construction screws
- Level (4-foot or laser)
- Framing square
- PPE: safety glasses, hearing protection, dust mask
The most common mistake is undersizing the framing. A riser supporting 800 to 1,200 pounds of seats and people must be overbuilt. Use 2×6 or larger joists and ensure the platform ties into wall studs or floor framing where possible.
Permit requirements vary by jurisdiction. Some municipalities treat a fixed riser as a structural addition requiring a permit and inspection, especially if it’s fastened to the foundation or load-bearing walls. A floating platform (not anchored) often skirts permit rules, but check local codes.
If the project involves electrical work, adding outlets, lighting, or in-floor subwoofers, hire a licensed electrician. Running cable through walls or floors typically requires compliance with NEC (National Electrical Code) standards.
Professional installation makes sense if the room has complex geometry, if the riser needs to integrate with custom cabinetry or acoustic treatments, or if the homeowner lacks confidence in framing. Expect to pay $1,500 to $4,000 for a single-tier riser, depending on size, finish, and regional labor rates.
Popular Tiered Seating Design Options and Configurations
Single-tier layouts are the most common in residential theaters. One riser elevates a back row, leaving the front row at floor level. This works well in rooms with 12 to 16 feet of depth and keeps construction straightforward.
Double-tier setups add a second riser for a third row. These suit larger basements or dedicated theater rooms and create the true stadium feel. The second riser is typically the same height as the first (12 to 18 inches), though some builders taper the height slightly to maintain consistent viewing angles.
Curved or angled risers follow the arc of curved seating arrangements, often seen in upscale home theater builds. These require more complex carpentry, cutting joists to radial layouts and scribing curves into the plywood deck. Unless aesthetics justify the extra labor, straight risers are more practical.
Floating platforms rest on adjustable feet or rubber pads, making them removable. This appeals to homeowners who may repurpose the space later. The tradeoff: floating risers can feel less solid underfoot and may resonate with subwoofer output.
Built-in features elevate the design. Some installers add:
- LED step lighting along riser edges (low-voltage, dimmable)
- Cup holders and side tables integrated into armrests or platform edges
- Tactile transducers (bass shakers) mounted under seats for immersive low-frequency effects
- Storage drawers in the riser framing for media, blankets, or equipment
Finishing materials matter. Carpet is the default, it’s forgiving, absorbs sound, and hides imperfections. Luxury vinyl plank (LVP) or engineered hardwood give a cleaner look but amplify footfall noise unless underlayment is installed. Avoid tile or stone: they’re hard, cold, and reflect sound.
For a polished look, wrap riser fronts with painted MDF, fabric panels, or acoustic-transparent cloth stretched over a frame. This conceals the framing and creates a kickplate that protects the edge from scuffs.
Many home technology guides recommend coordinating riser design with the room’s acoustic treatment, bass traps, wall panels, and ceiling clouds. A well-integrated riser supports both form and function, blending into the overall theater aesthetic without looking like an afterthought.
Conclusion
Tiered seating transforms a home theater from a room with a big screen into an experience that genuinely competes with commercial cinemas. Whether tackling the build as a weekend project or hiring a pro, the investment in proper planning and construction pays off every time someone settles into that back row and realizes they can actually see.