Table of Contents
ToggleIf you’ve ever left a movie theater and wished you could recreate that immersive audio experience in your living room, a Sony 5.1 home theater system might be exactly what you’re after. Sony’s been a heavyweight in consumer audio for decades, and their 5.1 surround systems deliver cinema-quality sound without requiring a degree in audio engineering to set up. Whether you’re upgrading from a basic soundbar or building a dedicated media room from scratch, understanding what makes these systems tick, and how to install them properly, will save you time, money, and a lot of frustration.
Key Takeaways
- A Sony 5.1 home theater system delivers cinema-quality surround sound through five speakers and one subwoofer, with affordable HTIB packages or flexible component options to match any room size and budget.
- Proper speaker placement—including center channel at ear level, 2–3 feet above ear level for surrounds, and strategic subwoofer positioning—is critical to achieving immersive audio quality.
- Run your Sony receiver’s auto-calibration feature with the included microphone to automatically set speaker distances, levels, and crossover points, ensuring professional-grade setup without technical expertise.
- Use fire-rated CL2 or CL3 speaker cable for in-wall installations and confirm impedance matching (typically 6 or 8 ohms) between speakers and receiver to prevent equipment damage.
- Room acoustics matter as much as equipment—add soft furnishings like rugs and curtains, acoustic panels, and avoid corner placement for subwoofers to eliminate reflections and standing waves that muffle sound.
- Even modest Sony 5.1 systems outperform expensive setups when correctly positioned and calibrated, making thoughtful installation more important than budget.
What Is a Sony 5.1 Home Theater System?
A 5.1 home theater system consists of six separate audio channels: five full-range speakers and one subwoofer. The “5” represents the five main speakers, left front, center, right front, left surround, and right surround. The “.1” is the dedicated subwoofer that handles low-frequency effects (explosions, bass lines, rumbling thunder).
Sony manufactures both component systems (where you buy a receiver and speakers separately) and home theater in a box (HTIB) packages. The HTIB route is popular with DIYers because everything’s matched and sized to work together right out of the carton. You’ll get the AV receiver, five satellite speakers, one powered subwoofer, and all necessary speaker wire.
Most Sony 5.1 systems support Dolby Digital and DTS surround formats, which are standard for Blu-rays, streaming services, and gaming consoles. Higher-end models add Dolby Atmos or DTS:X for height channels, but those fall outside the traditional 5.1 configuration.
Speaker impedance is typically 6 ohms or 8 ohms on Sony systems. Match this to your receiver’s output rating, mismatched impedance can cause overheating or damage the amp. Check the back panel of both the receiver and speakers before you wire anything up.
Top Sony 5.1 Home Theater Systems for Your Home
Best Budget-Friendly Options
For rooms under 300 square feet, Sony’s HT-S40R hits the sweet spot between cost and performance. This HTIB includes a soundbar that houses the front left, center, and right channels, plus two wireless rear speakers and a wired subwoofer. The wireless rear speakers are a genuine advantage, you won’t need to fish speaker wire through walls or run it under baseboards. The system outputs 600 watts total power and connects via HDMI ARC, optical, or Bluetooth. Some wireless connectivity features have been refined in recent models to reduce latency and improve pairing reliability.
Another solid budget pick is the Sony BDV-E4100, which bundles a Blu-ray player into the receiver. If you’re still building a physical media collection or want upscaling for older DVDs, this makes sense. It’s harder to find new as of 2026, but refurbished units sell for $250–$350. The satellite speakers are compact (3 inches tall), so they mount easily on walls with the included brackets.
Both options support USB and HDMI inputs, making them compatible with streaming sticks, game consoles, and set-top boxes. Just confirm your TV has an HDMI ARC port (most models from 2016 onward do) or you’ll need to use optical audio instead.
Premium Sony Home Theater Solutions
If budget isn’t the limiting factor, the Sony STR-DH790 receiver paired with a set of Sony SS-CS5 tower speakers delivers a massive step up in clarity and power handling. The STR-DH790 pushes 145 watts per channel (at 6 ohms) and supports 4K HDR pass-through with Dolby Vision. You’ll need to buy speakers separately, but that flexibility lets you tailor the system to your room size and acoustic needs.
For the front left and right channels, the SS-CS5 towers use a three-way design with dual 5-inch woofers, which means better midrange detail and more dynamic bass response before the subwoofer even kicks in. The matching SS-CS8 center channel uses a two-way design and fits on most TV stands without blocking the screen. For surrounds, the SS-CS3 bookshelf speakers are compact but still use a three-driver array.
Add a Sony SA-CS9 subwoofer (10-inch driver, 115-watt amplifier) and you’ve got a system that can fill a 400+ square foot space without distortion at high volumes. Total investment runs $800–$1,200 depending on sales, but the component approach means you can upgrade piece by piece down the road.
Consider whether your room will benefit from in-wall or in-ceiling speakers for the surrounds. If you’re renovating or have access to the stud bays, in-wall mounting keeps speakers invisible and frees up floor space. Sony doesn’t manufacture many in-wall models, so you may want to mix brands, just keep impedance consistent.
How to Set Up Your Sony 5.1 System Like a Pro
Safety first: If you’re running speaker wire through walls or ceilings, make sure you’re using CL2 or CL3 rated cable (fire-rated for in-wall use). Standard lamp cord or zip cord isn’t code-compliant and can be a fire hazard. Check your local building codes, some jurisdictions require a low-voltage permit for in-wall speaker runs.
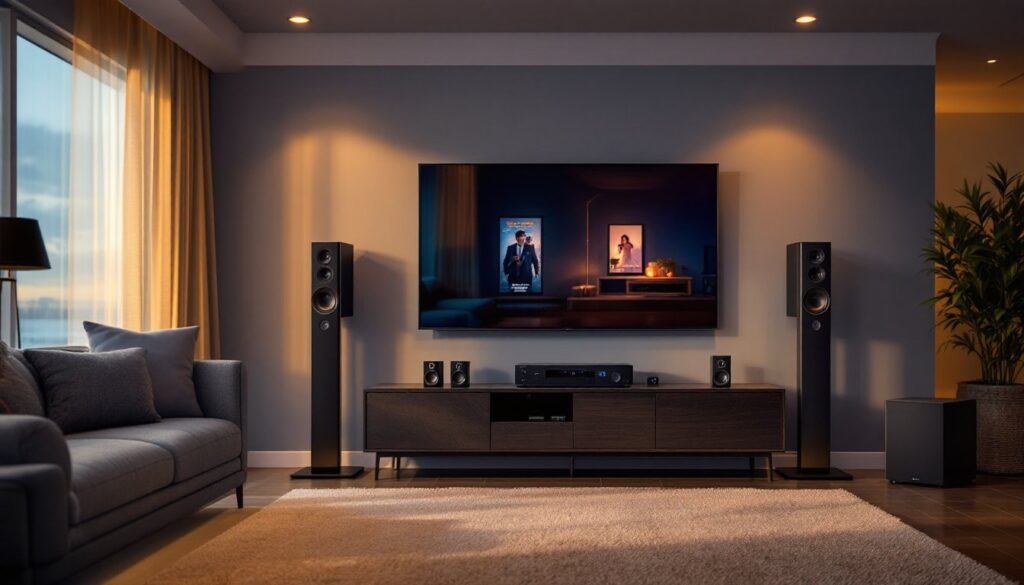
Step 1: Position the center channel. Place it directly below or above your TV, aimed at ear height when you’re seated. The center handles most dialogue, so if it’s angled wrong, voices sound muffled or off-axis.
Step 2: Place front left and right speakers. Angle them inward (“toe in”) about 10–15 degrees toward the primary listening position. If you’re using tower speakers, keep them at least 2 feet from side walls to avoid boundary reinforcement that muddies bass.
Step 3: Position surround speakers. Mount them 2–3 feet above ear level and slightly behind the main seating area. Aim the drivers toward the listening position, not straight down. For wall mounting, locate the studs with a stud finder and use the brackets included with the speakers or universal mounts rated for the speaker weight.
Step 4: Place the subwoofer. Start by putting it in a front corner, corner loading naturally amplifies bass. If it sounds boomy, pull it 1–2 feet away from the walls. Another trick: place the sub in your main seat, play bass-heavy content, then crawl around the room’s perimeter until you find the spot where bass sounds tightest. Swap positions, put the sub where you were listening.
Step 5: Run speaker wire. Use 16-gauge or 14-gauge wire for runs under 50 feet. Strip about 3/8 inch of insulation from each end, twist the strands tight, and connect positive to positive (usually marked red or with a stripe) and negative to negative. Loose connections cause hum, distortion, or dropouts.
Step 6: Connect to the receiver. Match each speaker output on the receiver (clearly labeled: Front L, Front R, Center, Surround L, Surround R, Subwoofer) to the corresponding speaker. The subwoofer uses an RCA cable, not speaker wire. Plug HDMI from your sources (Blu-ray, streaming box, console) into the receiver’s HDMI inputs, then run one HDMI output from the receiver to your TV’s HDMI ARC input.
Step 7: Run auto-calibration. Sony receivers include Digital Cinema Auto Calibration (DCAC) or a similar feature. Plug in the included mic, place it at ear height in your main seat, and let the receiver measure distances and levels. This sets speaker size, crossover points, and trim levels automatically. You can tweak manually later, but the auto setup gets you 90% of the way.
If you’re unsure about fishing wire through finished walls, hire a low-voltage electrician. It typically costs $100–$200 and ensures clean routing without drywall damage.
Optimizing Your Room for the Best Sound Experience
Speakers only do half the work, your room does the rest. Hard surfaces (drywall, hardwood, tile, glass) reflect sound waves and create echoes or standing waves that smear imaging and muddy bass. Soft surfaces (rugs, curtains, upholstered furniture) absorb sound and tame those reflections.
Start with the basics. If you have hardwood or tile floors, add an area rug between the front speakers and your seating position. This kills early reflections that bounce off the floor. Heavy curtains on windows behind or beside the front speakers prevent slap-back echo. Even modern smart home technology setups benefit from these acoustic fundamentals, advanced room correction software can’t fix severe reflections alone.
For dedicated media rooms, consider adding acoustic panels to the first reflection points. Sit in your main seat and have someone hold a mirror flat against the side walls. Wherever you see a speaker reflected, that’s a first reflection point, mount a 2-inch thick acoustic panel there. You can buy commercial panels or DIY them with Roxul Safe’n’Sound insulation wrapped in fabric and mounted in a simple wood frame.
Bass is harder to control. Corners and wall-floor junctions amplify low frequencies unevenly, causing boomy spots and dead zones. If you’ve run the receiver’s auto-calibration and bass still sounds muddy, try moving the subwoofer in 6-inch increments and re-running calibration each time. Small changes make a big difference below 80 Hz.
Ceiling height matters more than most DIYers realize. Rooms with 8-foot ceilings can create a strong resonance around 70 Hz. You might need to lower the subwoofer’s crossover point or reduce its level slightly. Vaulted or open-concept rooms often need more subwoofer power because there’s more cubic volume to fill.
Tested recommendations from independent product reviews often highlight that speaker placement beats expensive gear every time. A $500 system set up correctly will outperform a $2,000 system placed poorly. Take the extra hour to measure distances and angles before you start drilling mounting holes.
Conclusion
A Sony 5.1 home theater system brings movie-night energy to any living room, basement, or dedicated media space, but only if it’s set up with care. Run the calibration, respect your room’s acoustics, and don’t skip the prep work. Your ears will thank you, and so will everyone who asks why your living room sounds better than the local multiplex.